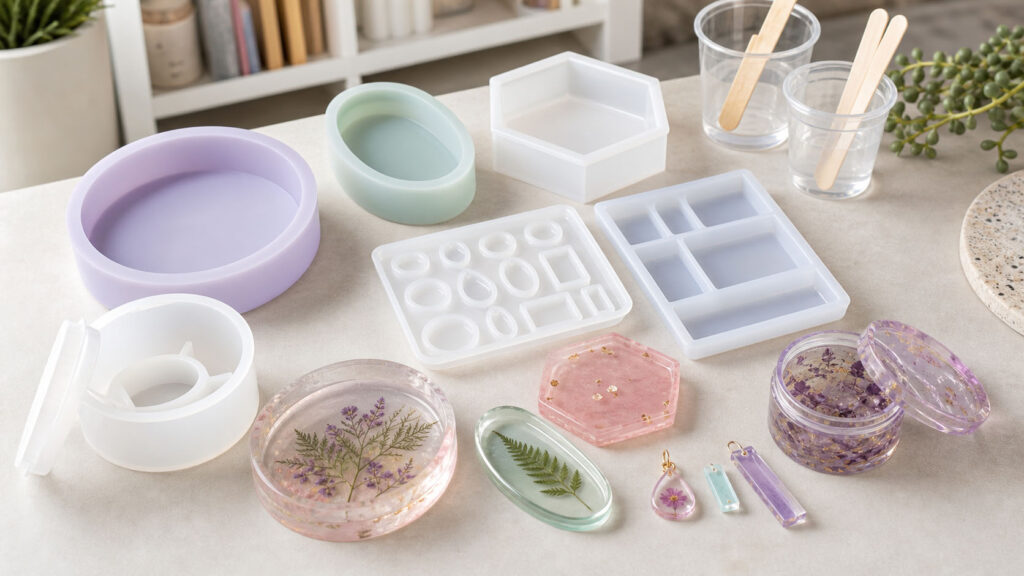
A silicone mould can define the shape, scale and surface character of a resin project before any resin is mixed. Choosing one therefore involves more than finding an appealing design. The cavity dimensions, depth, finish, component arrangement and requirements of the intended resin all need to suit the result you have in mind.
This guide focuses on that selection process. It does not replace the instructions supplied with a mould or resin system, but it will help you compare products more carefully and recognise the details that matter before starting a cast.
Start with the finished object, not the mould photograph
Begin by defining what you want the finished cast to be. A pendant, tray, storage jar and decorative shape may all be made using silicone moulds, but they present very different decisions about dimensions, depth and component layout.
Write down the essential features of the intended result:
- The overall shape you need
- The approximate finished dimensions
- Whether the object should be shallow or deep
- Whether it requires a lid, insert or separate component
- Whether the surface should be plain, ribbed, faceted or otherwise detailed
- Whether one large cavity or several smaller cavities would be more useful
This simple brief makes browsing the wider range of silicone moulds more purposeful. It also reduces the likelihood of choosing a visually attractive mould that does not produce the size or format required.
Read dimensions as finished-cast information
Product titles and descriptions may provide measurements for the mould, the cavity or the expected cast. Do not assume which measurement is being shown. Check the wording on the individual listing and seek verification if the basis of a dimension is unclear.
Compare width, length and depth
Width and length indicate whether the result will fit its intended setting, but depth can be equally important. Two moulds with similar outlines may produce objects with substantially different capacities or profiles.
For a tray or dish, check the overall footprint as well as the depth of the usable area. For a jar or pot, consider both the external form and the internal space created by any insert. For jewellery, small changes in length or width can materially alter the visual scale of the finished piece.
Check every component
A lidded box mould may include a body cavity and a lid cavity. A jar mould may use an insert to form its interior. A multi-shape mould may contain cavities with different dimensions. Read the complete listing to establish what is included rather than assuming that every item shown or named follows the same arrangement.
If exact measurements are essential to the project, verify them before ordering. A product described as small, large or low-profile still needs numerical dimensions to support a precise decision.
Choose a mould structure that matches the project
The shape of the finished object affects the type of mould structure required. A simple open cavity differs from a design that uses an insert, lid or multiple casting sections.
- Open-cavity moulds suit objects formed from a single exposed cavity.
- Multi-cavity moulds allow several related pieces or shapes to be cast from one mould.
- Insert moulds use an additional component to create an internal space or other formed area.
- Lidded designs create separate body and lid components that must correspond as described by the product.
More components can mean more details to check. Confirm how many mould pieces are supplied and whether the product creates the complete object shown in its name. The Resin Studio range provides examples across practical, decorative and jewellery-focused formats.
Match the resin to the mould and cavity
A silicone mould does not by itself establish which resin should be used. Resin systems differ in mixing requirements, working times, curing methods and recommended pour depths. Check both the mould listing and the resin instructions before treating them as a suitable pairing.
The broader epoxy resin range includes different product formats, so choose according to the intended project and the manufacturer’s stated application. Do not rely on the word “epoxy” alone when the cavity is deep, unusually shaped or divided into several components.
Consider colour and clarity at the planning stage
The intended appearance can also influence product selection. If the design depends on transparency, review products specifically presented within the clear resin range and check their individual instructions.
For coloured or inclusion-based work, consider whether the mould’s detail will remain visible in the planned finish. Strong colour, dense decorative material or an opaque effect may present fine surface detail differently from a transparent cast. This is a design consideration rather than a fixed rule, so small-scale testing may be appropriate when the final appearance is critical.
Look closely at surface detail
Words such as smooth, ribbed, faceted, wavy or decorative describe more than the outline. They indicate the surface character built into the mould and therefore the form the cast is intended to reproduce.
A plain design can place greater visual emphasis on colour and inclusions. A faceted or ribbed mould adds its own structural pattern. Neither is automatically better; the right choice depends on whether the mould or the resin treatment should provide the dominant visual feature.
Inspect all supplied product images and read the title carefully. Similar shapes may be offered with different lids, inserts, profiles or textures. When two listings appear nearly identical, use their full names and measurements to distinguish them.
Select jewellery moulds by purpose and scale
Jewellery moulds deserve particular attention because small differences can affect the proportions of the finished piece. Before choosing from the jewellery moulds, check the dimensions of each cavity and whether the design includes any opening or feature described for assembly.
Consider whether you need one statement shape, several matching pieces or a mixed set. A multi-cavity design may offer variety, while a single-cavity mould can focus on one specific form. The listing should remain the authority for the exact number, size and arrangement of cavities.
Prepare the workspace before mixing
A good mould choice still needs an organised working area. Before starting, gather the resin components and the equipment specified by their instructions. Place the mould on a stable work surface and check that the cavity is clean, dry and free from visible debris.
Useful workbench items depend on the resin and project, but may include correctly sized mixing containers, measuring equipment and stirring tools. Browse relevant craft and workbench supplies only after identifying what the selected resin instructions require.
Do not begin mixing until the mould, tools and intended additions are ready. Resin working times vary, and an incomplete setup can make an otherwise straightforward project more difficult.
Follow the stated filling and curing guidance
Use the mixing ratio, measuring method and curing conditions specified for the chosen resin. Do not estimate ratios or transfer instructions from a different product. If the manufacturer states a maximum pour depth, working time or environmental requirement, treat that information as part of the mould-planning process.
Keep the mould supported as required by its form and avoid moving the setup unnecessarily during curing. Wait for the resin to reach the stated demoulding stage before removing the cast. If the cure is incomplete or the surface remains unsuitable, consult the resin instructions rather than forcing the piece from the mould.
Avoid these common mould-selection mistakes
- Buying by shape alone: confirm the dimensions, depth and component arrangement.
- Assuming a lid is included: look for an explicit reference to a lid or separate lid cavity.
- Confusing mould size with cast size: verify what the listed measurements describe.
- Ignoring inserts: establish whether an insert is supplied and what form it creates.
- Choosing resin afterwards: check resin requirements while evaluating the mould.
- Overlooking surface texture: decide whether plain, ribbed, faceted or decorative detail supports the planned finish.
- Treating similar listings as identical: compare full names, measurements and included parts.
A practical checklist before ordering
- Define the intended finished object.
- Confirm the cavity or finished-cast dimensions.
- Check the depth and overall profile.
- Identify every included mould component.
- Review the stated surface texture or decorative detail.
- Confirm that the intended resin is suitable according to the supplied instructions.
- Check that the required mixing and workbench equipment is available.
- Save the product instructions for use during preparation and curing.
The most useful silicone mould is not simply the most decorative one. It is the mould whose size, structure, surface and component layout align with a clearly planned resin project. Taking a few minutes to compare those details before ordering can make the complete crafting process easier to organise and the intended result easier to understand.