
Description
Prepare mixed craft resin before pouring
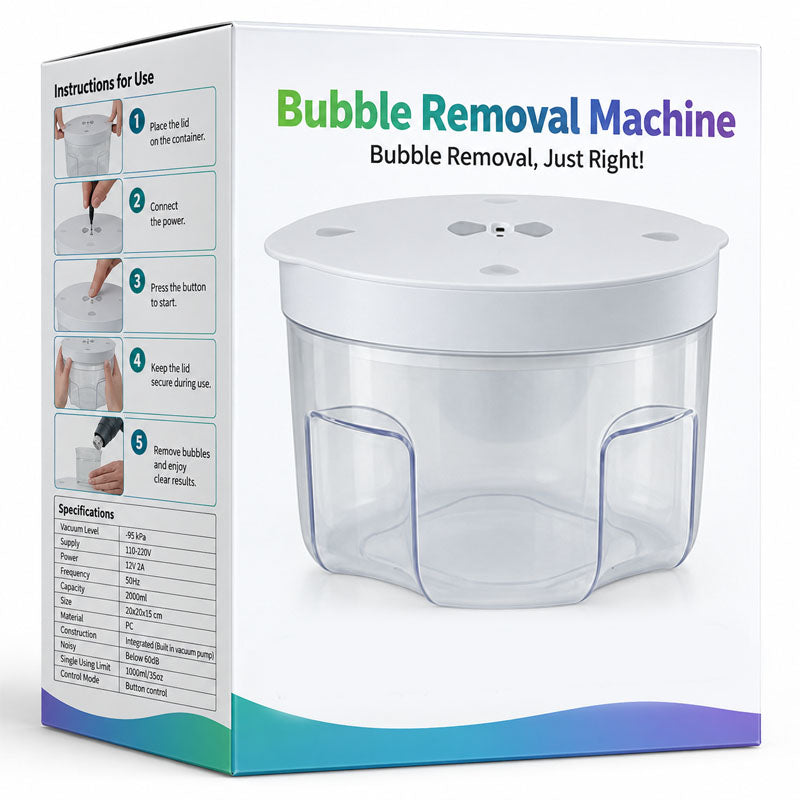
This compact vacuum device is designed to help remove trapped air bubbles from mixed craft resin before pouring, making it a useful tool for a range of small creative projects.
Clear and straightforward operation
The transparent chamber lets you monitor the resin during use, while simple controls on the top make operation straightforward.
Ideal for small craft projects
- Resin art
- Jewellery
- Mould casting
- Other small craft projects
Compact and practical, this vacuum bubble remover is a helpful addition to a resin craft workspace.
Using the Vacuum Bubble Remover
Resin selection
Recommended for use with deep casting or regular resin. Fast-drying resins may affect bubble removal due to their curing speed and viscosity.
Mixing the resin
Mix the resin thoroughly before placing it in the machine. The mixture should be smooth and free from streaks or threads before vacuuming.
If the resin temperature is too low, warming it to approximately 70–80°F (21–27°C) can help improve bubble removal.
During bubble removal
Keep the suction port at least 3–5cm away from the resin. For more viscous resin, increase this distance as necessary to help prevent resin from being drawn into the air pipe.
If small bubbles remain on the surface after vacuum treatment, a heat gun can be used to remove them.
Preventing resin from entering the machine
Before operation, the opening of the resin cup can be covered with a lightweight piece of dry, smooth cardboard with ventilation holes. This helps reduce the risk of overflowing resin being drawn into the machine.
Check the lid before use
Before each use, make sure the lid is completely closed and that the sealing ring is correctly installed. A proper seal is required for the machine to create a vacuum and operate correctly.
Alarm warning
If air cannot be exhausted correctly, the indicator light will provide a warning after a few seconds.
Releasing the vacuum
Do not unplug the machine immediately after bubble removal. Press the RELEASE button and wait approximately 30 seconds for the pressure to release completely.
Removing the resin
Make sure the pressure has been completely released before opening the machine. Hold the machine securely and slowly lift the lid using both thumbs to help prevent resin from spilling.
Cleaning and maintenance
Clean resin spills promptly before they cure and become more difficult to remove.
Clean the air pipe and exhaust port immediately after each use, particularly when working with quick-drying resin. Resin allowed to solidify inside these areas may cause a blockage.
Regular cleaning and keeping resin away from the suction system will help prevent blockages in the air pipe or vacuum pump and extend the working life of the machine.
Frequently Asked Questions
Can cured resin be placed in the machine for bubble removal?
No. The machine is intended for uncured resin. Deep casting or regular resin is recommended.
Why might bubble removal be less effective?
Try extending the bubble-removal time. Also check that the machine is operating correctly and able to evacuate air properly. Fast-drying resin and resin that is too cold can reduce degassing efficiency.
What should I do if the lid will not open after bubble removal?
Do not unplug the machine immediately. Press the RELEASE button and wait approximately 30 seconds for the pressure to release completely before attempting to open the lid.
Why does the button light up after the machine has been running for a few minutes?
The machine is equipped with a pressure sensor. When the internal vacuum reaches approximately -90kPa, the indicator button lights green and activates a 10-minute timer.