Resin Jewellery Starter Kit, Beginner How To Guide
Resin jewellery can look complicated at first. Measuring, mixing, curing, all that waiting around. But once you do it once, it usually clicks. This guide is written for complete beginners, using a jewellery starter kit workflow so you can focus on learning the process, not fighting the materials.
Why a Jewellery Starter Kit Helps Beginners
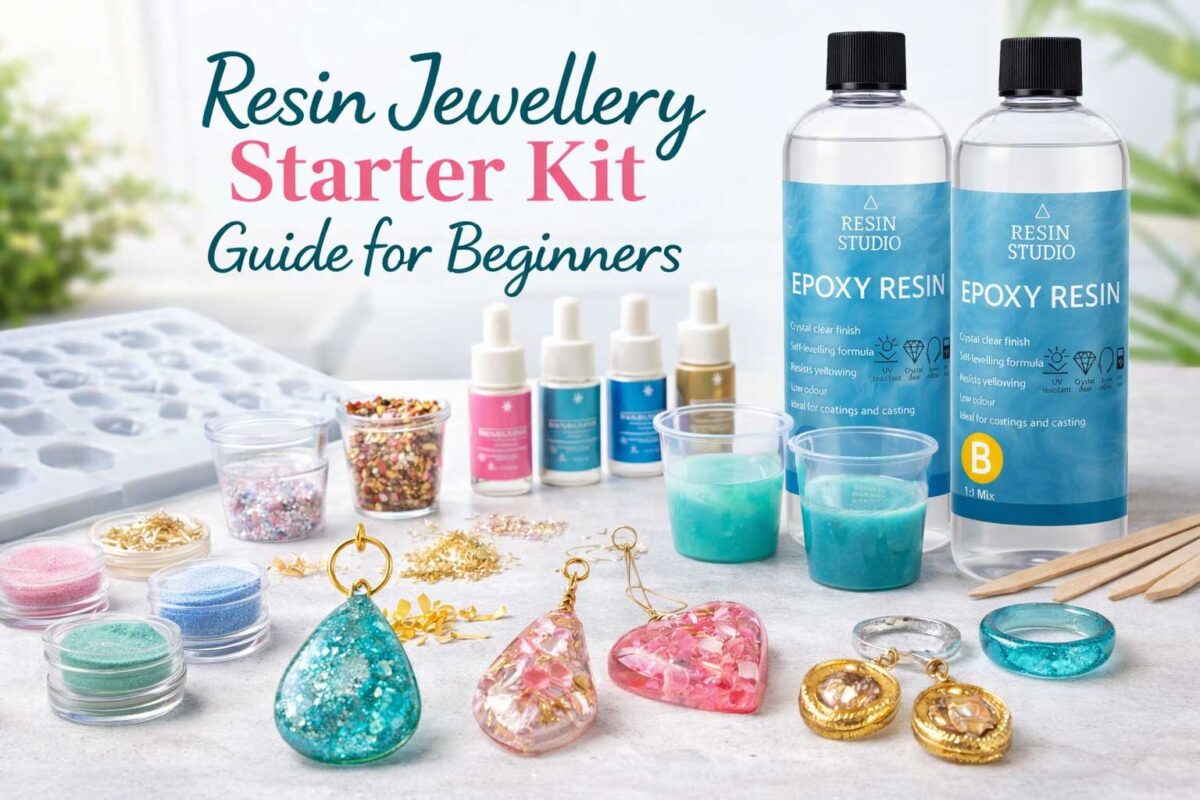
Buying resin, moulds, pigments and tools separately can get messy fast. Small mismatches add up. Ratios get guessed, pigments can behave oddly, cups are too small, mixing sticks vanish. A starter kit keeps things simple because the components are chosen to work together.
The Resin Studio Craft Resin Starter Kit is designed specifically to remove that early uncertainty. Everything inside it works together, so you can focus on learning the process rather than second guessing your materials.
- Reduces guesswork for first-time resin makers
- Supports a calmer, repeatable workflow
- Helps you learn technique before experimenting
What You Can Make
Jewellery starter kits are best for small, shallow pours where clarity and finish really matter. If you’re new, these are the projects that feel achievable without being boring.
- Pendants and charms
- Earrings and studs
- Rings and small cabochons
- Keyrings and decorative tags
All of these projects can be made using a single resin starter kit, which keeps the learning curve manageable for your first few sessions.
Before You Start, Quick Setup Checklist
Resin rewards preparation. Five minutes setting up properly saves you from most beginner mistakes. Aim for a warm, dust-free room, a flat surface, and everything laid out before you open the resin.
- Protect your work surface with disposable paper or a silicone mat
- Work on a level table to avoid uneven pours
- Wear gloves to keep things clean and avoid skin contact
- Have cups, sticks, moulds and pigments ready before mixing
If you are starting from scratch, having everything supplied in the Resin Studio Craft Resin Starter Kit makes this setup step much easier.
Step by Step, Make Your First Resin Jewellery Piece
1. Measure the Resin Accurately
Resin comes in two parts that must be mixed correctly. Use the measuring cups not included with your kit and follow the ratio exactly. Guessing here is the most common cause of curing problems.
2. Mix Slowly and Thoroughly
Combine the parts and stir gently, scraping the sides and bottom of the cup. Fast stirring introduces bubbles. Slow, steady mixing gives better results.
3. Add Colour Carefully
Add pigment a tiny amount at a time. Resin pigments are concentrated, so build colour slowly until you reach the look you want.
4. Pour Into the Mould
Pour slowly into the mould, starting at one edge and letting the resin flow naturally. This helps air escape and reduces surface bubbles.
5. Let It Cure
Leave the mould undisturbed for the full curing time. Avoid moving or checking it repeatedly. Resin cures best when left alone.
6. Demould and Finish
Once fully cured, gently flex the mould to release your piece. Minor imperfections are normal on early attempts and improve quickly with practice.
What to Expect From Your First Attempt
Your first pieces will not be perfect, and that is fine. They should be solid, glossy, and wearable. Each attempt teaches you something new about colour, bubbles, and timing.
What to Try Next
Once you are comfortable with the basics and the workflow used in the starter kit, you can start experimenting more confidently.
- Layering colours for depth
- Adding glitter, foil, or flakes
- Embedding dried flowers or inclusions
- Exploring different mould shapes
Is Resin Jewellery Hard to Learn?
It looks more intimidating than it is. With a starter kit and a clear process, most beginners produce usable pieces in their first session. The key is slowing down and letting the materials do their job.
If you are unsure where to start, using a complete kit like the Resin Studio Craft Resin Starter Kit removes most of the early friction.