A clear pour can turn cloudy in seconds once tiny bubbles start rising through the mix. If you have been wondering how to remove bubbles from resin without ruining your mould, overworking the surface or wasting a batch, the good news is that most bubble problems are preventable and fixable with a few simple changes.
Bubbles usually show up for one of three reasons. Air gets whipped in during mixing, trapped in detailed moulds, or pulled into the resin because the room, bottle or surface is too cold. The right fix depends on when the bubbles appear, so it helps to think about the whole process rather than only reaching for a heat tool at the end.
How to remove bubbles from resin before you pour
The easiest bubbles to deal with are the ones you stop from forming in the first place. Start with resin and hardener at the right temperature. Cold resin is thicker, and thicker resin holds on to air far more easily. If your bottles feel chilly, stand them in warm water for a short time before mixing. You want them gently warmed, not hot.
Mixing style matters more than most beginners expect. Fast stirring feels efficient, but it introduces a lot of air. A slow, steady fold around the sides and base of the cup gives the two parts time to combine without creating a foam of microbubbles. If your resin system has a recommended mixing time, follow it, but keep the motion controlled rather than aggressive.
The mixing cup also makes a difference. A cup with straight sides helps you scrape thoroughly, while a flimsy cup that flexes can make mixing awkward and uneven. Once mixed, letting the resin stand for a minute or two can help some of the trapped air rise before pouring. This is especially useful for coating work and shallow moulds, though with fast-curing resin you do not want to leave it sitting so long that working time disappears.
Why bubbles happen in different resin projects
Not every project traps air in the same way. A flat coaster, a deep casting mould and a domed jewellery piece all behave differently. That is why one bubble-removal method can work brilliantly on one make and do very little on another.
Shallow pours often produce surface bubbles that respond well to gentle heat. Deep pours are more likely to trap bubbles throughout the mix, which means prevention during warming and stirring matters more. Silicone moulds with lettering, edges, flowers or textured details can hold pockets of air that need attention before the mould is filled completely.
Add-ins change things too. Mica powders usually disperse fairly easily, but glitter, dried botanicals, chunky inclusions and some pigments can all introduce extra air or create places for bubbles to cling. Clear resin shows every flaw, so it tends to need the most careful handling.
The best ways to remove bubbles after pouring
Once the resin is in the mould or on the surface, the aim is to help bubbles rise and pop without scorching the resin, warping the mould or blowing dust into the finish.
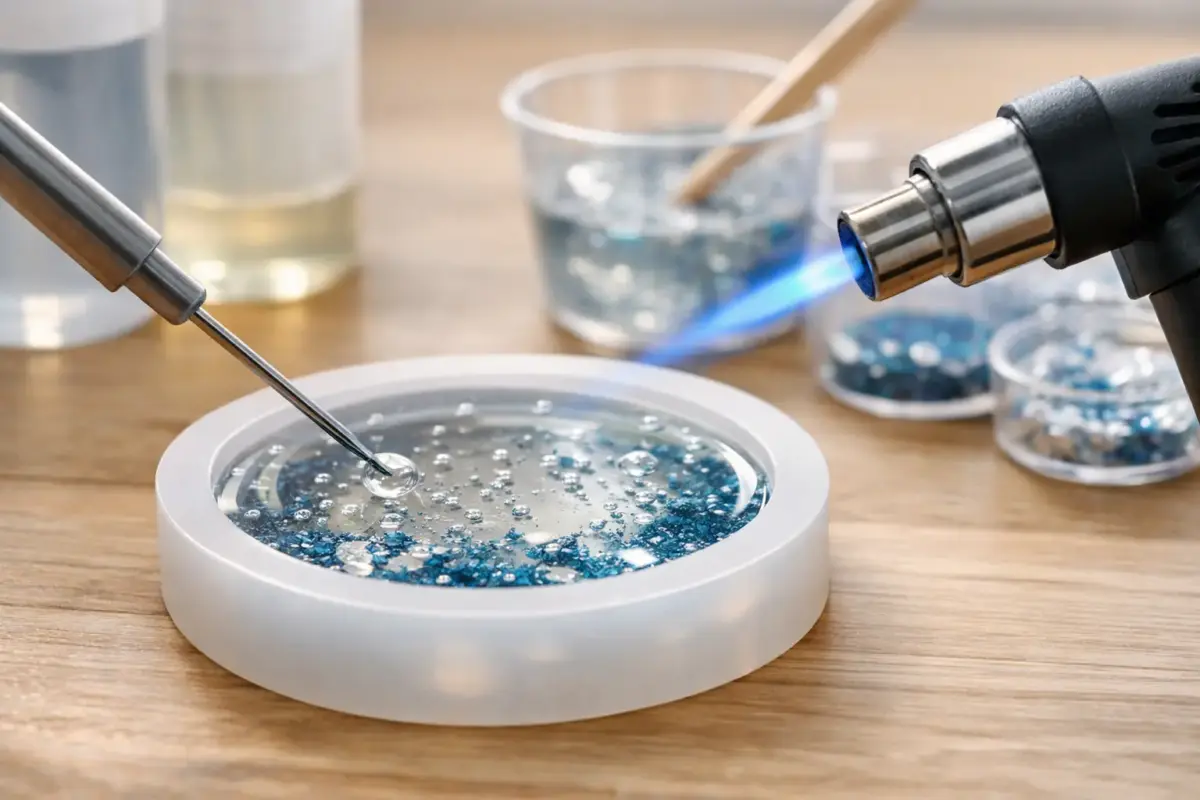
A heat gun is a popular option because it warms the surface quickly and encourages bubbles to break. Keep it moving and use it sparingly. Too much heat can distort silicone moulds, push resin over the edges or speed up curing unevenly. For thin surface bubbles on trays, coasters and artwork, a brief pass is often enough.
A small butane torch can also pop bubbles efficiently, especially on flat epoxy surfaces. It is best used by experienced makers who are confident working with heat and following safety guidance. You need a light hand. Hovering too long in one area can scorch the resin, yellow the surface or damage nearby materials.
For detailed moulds, a cocktail stick or silicone tool is often more useful than heat. You can guide resin into corners and tease out trapped air from letters, petals and fine edges before the top layer starts to set. Tapping the mould gently on your work surface can also release hidden pockets, though too much tapping may shift embedded items out of place.
If you spot a stubborn bubble near the top, a pin or toothpick can break it directly. This is simple, low-tech and surprisingly effective, especially with UV resin where you are working in small areas and can inspect the surface closely.
How to remove bubbles from resin in moulds
Mould work is where many makers get caught out. You can mix beautifully and still end up with bubbles if the resin never reaches all the tiny details cleanly.
The best approach is often to pour in stages. Start by adding a small amount of resin and use a tool or gloved finger to coat the fine details inside the mould. This initial layer pushes air out of awkward areas before the rest of the resin goes in. It takes a little longer, but it can make a big difference to the clarity of the finished piece.
Pouring slowly down the side of the mould instead of dropping resin straight into the centre also helps. A thin stream creates less turbulence, so fewer new bubbles form on impact. With deeper moulds, pausing halfway can give existing bubbles time to rise.
If you are adding dried flowers, charms or decorative pieces, place them carefully rather than pressing them in quickly. Fast movement can trap air underneath. Some makers like to coat inclusions lightly with resin first so they are less likely to carry bubbles into the main pour.
Room temperature, humidity and curing time
Sometimes the resin is not the main issue at all. Your workspace has a big effect on bubble formation. A room that is too cold thickens the resin and slows bubble release. A room that fluctuates in temperature can also affect curing and surface finish.
For most craft projects, a consistently warm room gives better results than trying to correct everything with extra torching later. Humidity matters as well, particularly with some resin types that can react badly to damp conditions. While humidity is more commonly linked to surface problems than internal bubbles, poor curing and haziness can make bubble issues look worse than they really are.
Patience counts here. Some tiny bubbles rise on their own if the resin has enough working time and the room is warm enough. That means the fastest fix is not always the best one. If you keep blasting the surface with heat every minute, you may end up introducing dust or overheating the top.
Common mistakes that make bubbles worse
One of the biggest mistakes is overmixing in a rush. Another is assuming more heat is always better. It is not. Gentle, controlled heat helps. Excessive heat creates a different set of problems.
Using the wrong resin for the project can also lead to frustration. A thicker resin may be fine for doming but awkward for deep, crystal-clear casts where bubble release matters more. Likewise, some fast-curing products leave less time for air to escape. If clarity is your priority, choose a resin suited to that kind of finish rather than trying to force a result from a formula designed for something else.
Dirty moulds and dusty cups can be misleading too. What looks like bubbles is sometimes debris or tiny imperfections on the mould surface. Clean tools, fresh mixing cups and a tidy bench make troubleshooting much easier.
Finally, do not forget safety. Heating resin, mixing larger batches and working for longer periods all call for the right gloves, breathing protection where appropriate, and good ventilation. Better results come from a better setup, not just better rescue tactics.
When a few bubbles are actually acceptable
If you are making a crystal-clear pendant or a polished serving board top, bubbles are usually unwelcome. But in some pieces, a few tiny bubbles are not a disaster. Tinted resin, heavily pigmented pours and abstract artwork can hide minor imperfections well. That does not mean standards do not matter. It just means perfection depends on the finish you are aiming for.
For small-business makers, that distinction is useful. Save your most exacting bubble-control process for products where clarity sells the piece. For opaque or textured designs, focus on consistency, cure quality and finish instead of chasing every microscopic air speck.
The good news is that bubble control gets easier very quickly once your setup is right. Warm resin, measured mixing, suitable tools and a steady hand solve most of the problem before it starts. If you are building your resin kit from scratch, having the right cups, stirrers, moulds, safety gear and finishing tools in one place makes the whole process simpler – which is exactly how we like to support makers at Resin Studio.
The next time bubbles appear, do not treat them as a mystery. They are usually a clue that something in the temperature, mixing or pouring process needs adjusting, and once you spot the pattern, clearer results become much easier to repeat.