A tacky pendant, a cloudy top coat, or a charm that cures on one side and stays soft on the other usually points to the same issue – the UV light is not right for the resin or the project. If you are trying to find the best UV light for resin, the answer is less about chasing the strongest lamp you can find and more about choosing a light that matches how you actually make.
For most resin crafters, the right UV lamp should cure reliably, fit the size of the pieces you make, and feel easy to use again and again. That matters whether you are making earrings at the kitchen table, topping keyrings for your small business, or adding quick domed details between larger pours. A good lamp saves time, but more importantly, it saves projects.
What makes the best UV light for resin?
The first thing to check is wavelength. Most UV resin is designed to cure best under 365nm to 405nm light, with 395nm to 405nm being common in craft lamps. If a lamp sits outside that useful range, it can still glow brightly and look convincing while giving poor curing results. Brightness alone is not enough.
Power matters too, but it is often misunderstood. A higher wattage lamp can speed things up, especially for slightly thicker pours or larger pieces, but it is not a magic fix for every problem. If your resin layer is too deep, your pigment load is too heavy, or your mould blocks the light, even a powerful lamp may struggle.
The best choice also depends on the shape of your work. Flat bezels, open-back jewellery and top coats are usually easy to cure. Deep moulds, opaque colours and enclosed areas are more demanding. That is why one crafter’s perfect handheld torch can be another crafter’s frustrating purchase.
UV torch or UV lamp?
This is where it helps to be honest about your projects. A UV torch is handy for small, precise jobs. If you need to hold dried flowers in place, tack down layers before moving a piece, or cure tiny jewellery details, a torch gives you control. It is especially useful when both speed and positioning matter.
The trade-off is coverage. A torch cures a small area at a time, so larger pieces can end up with uneven exposure if you rush. It can also be awkward for batch making, because you are effectively tied up holding the light where it needs to be.
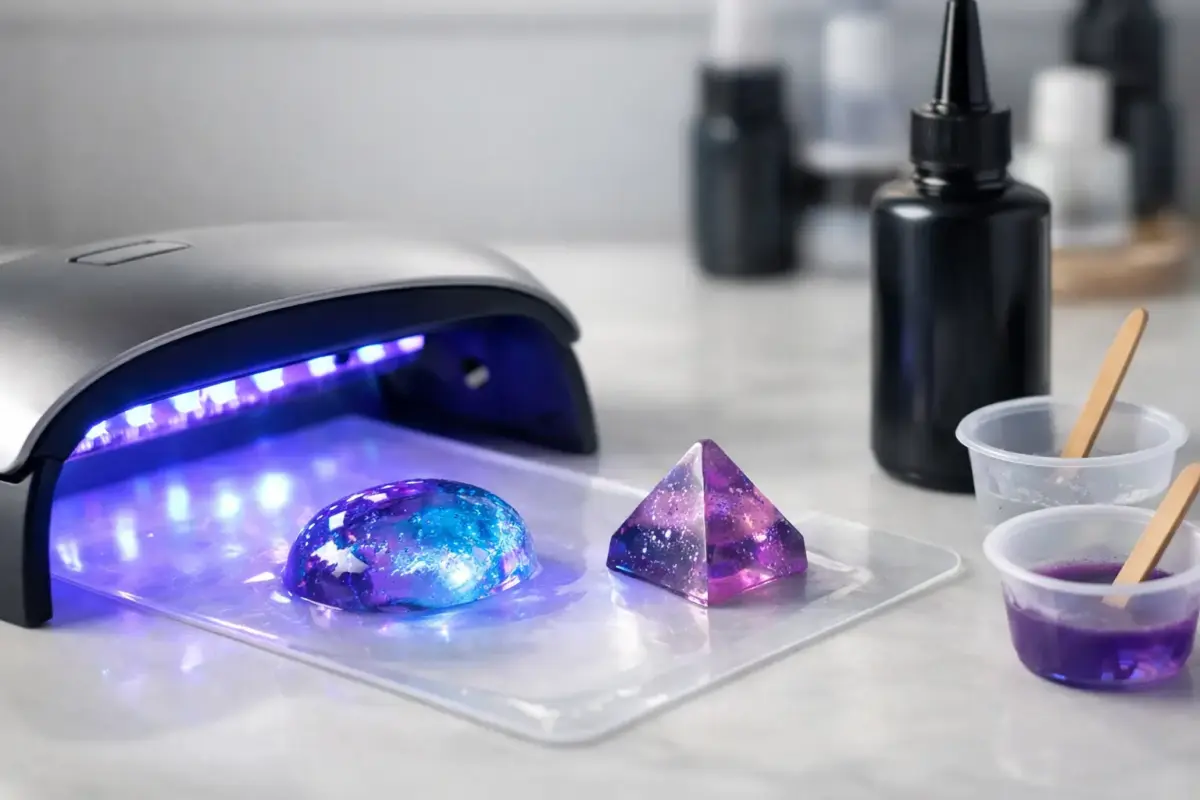
A desk lamp or nail-style UV lamp is usually the better fit for regular crafting. It gives broader, more even coverage and leaves your hands free. If you make bookmarks, coasters, layered pendants or lots of earrings at once, that convenience adds up quickly. For many makers, this is the best UV light for resin simply because it suits real workflow better.
Size matters more than most people expect
A lamp can have the right wavelength and decent power, then still disappoint because the curing area is too small. If your pieces sit near the edge of the lamp rather than under the LEDs, the cure may be patchy. That often shows up as sticky corners, dull patches or resin that looks set but marks easily.
For jewellery makers, a compact lamp is often enough. For trinket dishes, shaker moulds, bookmarks or multiple items cured together, more internal space makes life easier. You do not want to rotate every piece three times just to get a consistent finish.
It is also worth looking at lamp height. Some resin pieces are not especially wide, but they are bulky or domed. If the top sits too close to the LEDs, curing may be too intense in one area and weak in another. A bit of room inside the lamp helps the light spread more evenly.
Why some resin cures badly even with a good lamp
This is the part that catches beginners out. The light is only one piece of the setup. If you are using heavily pigmented resin, glitter-dense mixes or dark alcohol ink effects, less light reaches through the layer. The top may harden while the lower section stays soft.
The same goes for thickness. UV resin is best used in shallow layers unless the product specifically says otherwise. Trying to cure a deep pour in one go usually leads to surface curing and a soft centre. A stronger lamp may improve the result slightly, but it will not change the basic limitation of the resin.
Your mould can also affect curing. Clear moulds tend to help because light can pass through more easily. Opaque or very detailed moulds make curing slower and less even. If you often work with enclosed moulds, the best option is usually a lamp with strong, even coverage plus a willingness to cure in stages.
Features worth paying for
Some extras are genuinely useful and some are easy to skip. A timer is worth having because resin work tends to involve repeat steps. Being able to run 30, 60 or 120 second cycles keeps your process consistent, especially when you are making multiples.
A reflective interior is helpful too. It improves how evenly the light bounces around the curing space, which matters more than flashy design. Foldable legs or a removable base can be useful depending on your setup, particularly if you cure pieces directly on a silicone mat or need extra clearance for taller moulds.
Battery-powered torches have their place, but for regular bench use, a reliable plug-in lamp is usually more convenient. You get steadier output and one less thing to remember before a making session. If you sell your work or craft often, that reliability is worth more than novelty.
Choosing the best UV light for resin by project type
If you mainly make jewellery, charms and small embellishments, a compact UV lamp with a timer and even LED spacing is a sensible choice. You want enough coverage for a few pieces at once, but not so much bulk that it takes over your workspace.
If you use UV resin as a finishing material rather than a main medium, for example for doming, sealing or adding glossy detail, a torch and a small lamp can work well together. The torch handles spot fixing and the lamp gives the final cure.
If you make larger decorative pieces, think less about raw wattage and more about curing area and consistency. A larger lamp with broad coverage will usually outperform a tiny high-powered unit that forces you to keep repositioning everything.
For small business sellers, repeatability matters. The best UV light for resin in that case is the one that delivers the same result every time, across batches, without constant guesswork. A slightly pricier lamp that reduces failed pieces can easily be the better value.
Safety and setup still matter
Even when working with UV resin because it feels quicker and cleaner than two-part resin, basic safety still counts. Avoid staring at the light, protect your skin where sensible, and work in a well-ventilated area. Fast curing should not mean rushed habits.
Keep the lamp itself clean as well. Dust, resin drips and sticky fingerprints on the inside surface can affect performance over time. It is not glamorous advice, but a tidy curing area makes it easier to spot problems before they ruin a piece.
You will also get better results by pairing the lamp with realistic curing times. If the resin says two to four minutes, treat 20 seconds as a partial set, not a finished cure. A piece that feels firm immediately can still need longer to fully harden.
So which type is best?
For most crafters, the best all-round choice is a UV lamp rather than a torch, with a wavelength suitable for UV resin, a practical timer, and enough internal space for the projects you actually make. That gives the best balance of speed, coverage and consistency.
A torch is still worth considering as a second tool, especially if you enjoy detailed work or layered designs. But if you are buying one light to start with, a small to medium craft lamp is usually the most dependable option.
At Resin Studio, that is the kind of choice we encourage across resin supplies generally – not the flashiest tool on paper, but the one that helps you pour, cure and create with confidence. When your lamp matches your resin, your moulds and your workflow, the whole process feels easier, and your finished pieces show it.
The right UV light should make resin feel more predictable, not more fiddly. Pick for the projects on your table now, leave a little room for what you want to make next, and you will get far more value than you would from simply buying the most powerful lamp you can find.