That moment when a piece looks perfect in the mould and comes out with torn edges, cloudy patches or a warped shape usually comes down to one thing – the mould itself. Silicone moulds for resin can make your project feel easy and satisfying, or far more fiddly than it needs to be. If you want cleaner demoulding, better detail and fewer failed pours, choosing the right mould matters just as much as choosing the right resin.
For beginners, moulds can look quite similar at first glance. For experienced makers, the differences become obvious very quickly. Thickness, flexibility, finish, cavity depth and shape all affect how your resin behaves, how bubbles settle, and whether your cured piece pops out smoothly or needs extra sanding and rescue work.
What makes silicone moulds for resin a good choice?
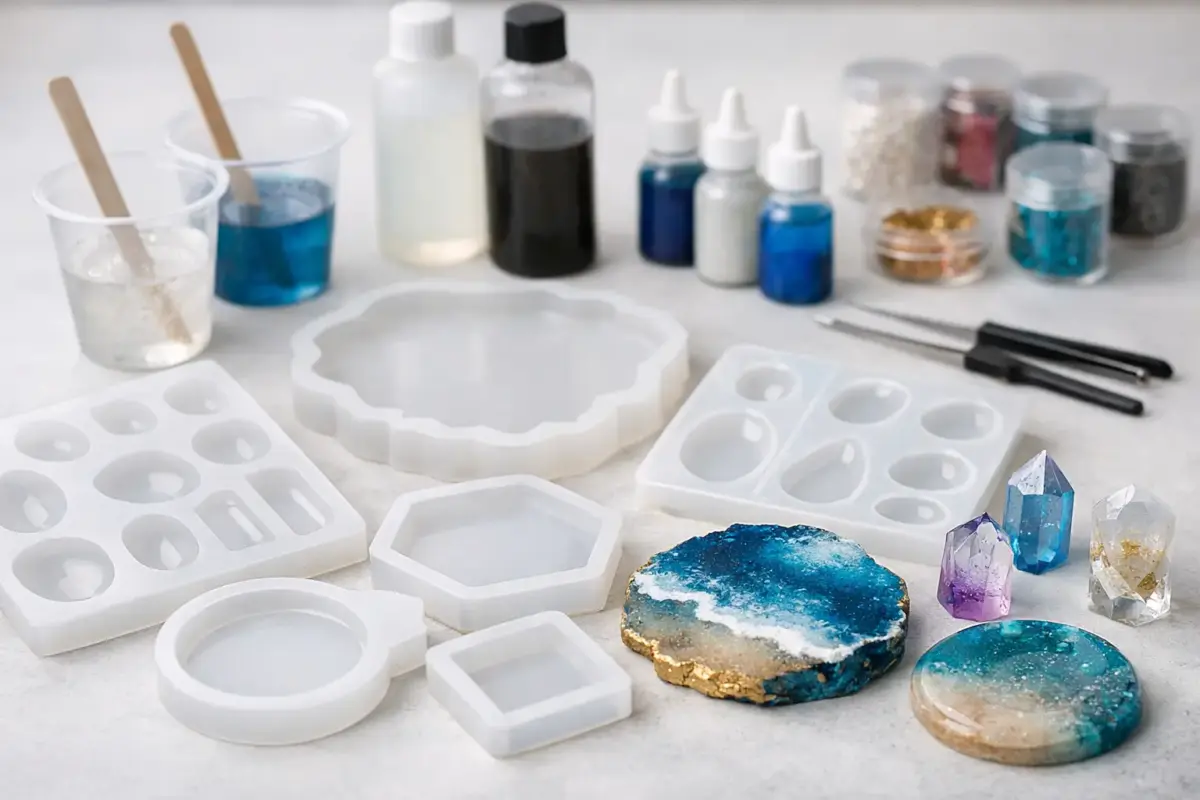
Silicone is popular for resin work because it is flexible, naturally non-stick and able to capture fine detail. That combination makes it ideal for everything from jewellery and keyrings to coasters, trays and decorative castings. A good silicone mould bends enough to release cured resin without damaging the piece, but still holds its shape while you pour.
That balance is where quality starts to matter. Very soft moulds can distort if they are moved before curing is complete, especially with larger pours. Very thin mould walls may also bow outward, which can leave you with uneven edges or a slightly misshapen final piece. On the other hand, a sturdier mould often gives a more reliable finish, particularly for flat items where level sides and crisp lines make all the difference.
The surface inside the mould also has a direct effect on the finish of your cast. A glossy interior usually gives resin a shiny surface straight out of the mould, while a matte or lightly textured mould creates a softer finish. Neither is wrong – it depends on the look you want and how much finishing work you are happy to do afterwards.
How to choose the right silicone moulds for resin projects
The best mould is not always the most detailed or the most eye-catching. It is the one that suits your project, your resin type and your confidence level.
Start with the project size
Small moulds are often easier for beginners because they use less resin, cure more predictably and are quicker to demould. Earrings, pendants and small charms are good early projects because mistakes are less expensive and easier to learn from. If you are working with a deep casting mould or a large tray, there is more room for heat build-up, trapped bubbles and uneven curing.
Larger moulds are still a great choice when you want statement pieces or products to sell, but they benefit from a bit more planning. You need to think about resin volume, working time and whether your mould can sit completely level throughout the cure.
Match the mould to the resin
Not every resin behaves the same way. UV resin works well in shallow, open-backed moulds where light can penetrate fully. Epoxy resin is usually the better option for thicker moulds and deeper pours, though cure times and pour depths vary by product. If the mould is deep and intricate, a resin with a longer working time often gives bubbles more chance to rise before curing begins.
This is where many makers get frustrated. The mould may be fine, but the resin is not suited to the cavity shape or depth. A simple pairing decision can save a lot of trial and error.
Think about shape and detail
Highly detailed moulds can produce beautiful results, but they are also less forgiving. Tiny letters, narrow channels and sharp corners are the places where bubbles like to hide. If you are new to resin, simpler shapes are often more satisfying because they release more easily and need less correction afterwards.
For makers who want polished, sale-ready pieces, detail still has its place. You just need to allow for slower pouring, more careful bubble management and gentle demoulding. There is a trade-off between visual complexity and ease of use, and it is worth being honest about how much finishing time you want to spend on each piece.
Signs of a mould that is worth buying
A reliable silicone mould usually feels consistent in thickness, with smooth cavity walls and no obvious rippling, tearing or greasy residue. It should hold its shape when empty and flex without looking flimsy. If a mould already appears stretched, misshapen or dusty before first use, that can show up in your casts.
A clean edge around each cavity is another good sign. Rough or uneven edges on the mould often transfer to the resin and create extra trimming work. If you make multiples for gifts, markets or small business orders, those little differences become much more noticeable.
It is also worth considering whether the mould design is realistic for repeat use. Some very decorative moulds look brilliant in photos but are awkward to fill, difficult to demould or hard to keep dust-free between pours. A practical mould that performs well again and again is usually a better investment than one that only works for a single idea.
Common problems with silicone moulds for resin
Most mould issues show up in predictable ways, which makes them easier to troubleshoot.
If your finished piece has a tacky patch, the problem is usually resin mixing or curing rather than the mould. If it has dull marks, tiny pits or a cloudy finish, the mould surface may be worn, scratched or contaminated. Dust, leftover resin and handling marks can all affect the final look.
Warping is often caused by movement during curing, a surface that is not level, or a mould that is too soft for the size of the piece. Tearing tends to happen when moulds are overstretched during demoulding or when sharp resin edges catch on delicate areas. Bubbles collecting in detailed sections usually mean the resin was poured too quickly or the mould shape needed more careful filling.
Sometimes the mould is simply at the end of its life. Silicone does not last forever, especially if it is used often, exposed to heat, stored badly or cleaned too aggressively. If a once-glossy mould starts producing dull casts every time, replacement is often the most practical answer.
Looking after your moulds properly
Good care helps moulds stay usable for longer and keeps your casts looking cleaner. After demoulding, remove any cured drips or residue gently rather than picking at them with anything sharp. A soft cloth and mild cleaning approach are usually enough. Harsh scrubbing can scratch the interior surface, and those scratches will transfer to future pieces.
Storage matters more than many people expect. Keep moulds flat where possible, away from direct sunlight, dust and anything heavy that could distort them. If a mould is bent or squashed in a drawer for weeks, it may not spring back perfectly when you need it.
It also helps to keep moulds dedicated to resin use. Using the same silicone items across different materials can lead to contamination, and that can affect curing or surface finish. If you rely on a mould for consistent results, treating it as a workshop tool rather than a general craft item is a smart move.
Choosing moulds for hobby use or selling
If you are making resin pieces for yourself, you have more room to experiment. You might choose unusual shapes, seasonal designs or novelty moulds just because they are fun to work with. That is part of the appeal of resin crafting – trying new ideas and seeing what suits your style.
If you are making products to sell, your priorities usually shift. Consistency, speed and repeatability matter more. A mould that gives sharp results with minimal finishing can save a surprising amount of time over multiple batches. It is often better to have a smaller collection of dependable moulds than a large stash you rarely trust.
This is also where buying from a specialist supplier can make the process simpler. When your moulds, resin, pigments and workshop essentials are chosen to work well for resin makers, it is easier to build a setup that feels straightforward rather than pieced together.
When it is worth upgrading your moulds
Not every project needs a premium mould, but there is a point where cheap moulds stop being good value. If you are replacing them frequently, spending too long fixing rough edges, or struggling with inconsistent results, an upgrade usually pays off in less waste and better finished pieces.
For beginners, the best route is often a few versatile moulds that are easy to use and suitable for common projects. For experienced makers, upgrading may mean choosing sturdier shapes, cleaner finishes and designs that fit the products you make most often. Resin Studio is built around that kind of practical choice – helping makers find supplies that actually support the way they create.
The right mould should make the process feel calmer. When your materials work with you instead of against you, you spend less time correcting problems and more time creating pieces you are proud to keep, gift or sell.